Representational state transfer (REST) is a software structure used for creating web services. The web services that fulfill the REST architecture is called RESTful web services. RESTful web services are used access and manipulate textual representation of web resources by predefined set of stateless operations.
Laravel is a popular PHP framework that provides an easy to create REST API with authentication. So if you’re looking for solution to create your own RESTful API with Laravel, then you’r here at the right place. In this tutorial you will learn how to create simple REST API with Laravel framework.
We will cover this tutorial step by step to create REST API with CRUD (create, read, update, delete) operations using Laravel with example.
Also, read:
- Create Simple RESTful API with PHP & MySQL
- Build Simple RESTful API with Laravel
- Create Simple REST API with Slim Framework
let’s proceed to build simple REST API with Laravel framework. We will have following file structure for this project.
- laravel_restful_api
- app
- User.php
- Product.php
- Http
- Controllers
- API
- BaseController.php
- RegisterController.php
- ProductController.php
- API
- Resources
- Product.php
- Controllers
- Providers
- AuthServiceProvider.php
- config
- auth.php
- Routes
- api.php
- app
Step1: Install and Create Laravel Project
First we will install latest Laravel and create project laravel_restful_api. We need to run following command with composure to install and create the Laravel project. If you have not installed composure, then you need to install composure before run this command.
composer create-project — prefer-dist laravel/laravel laravel_restful_api
Step2: Install Laravel Passport
As the latest Laravel recommends Laravel Passport to handle API authentication for production applications. It’s not so hard. We will install the Laravel passport using below command.
composer require laravel/passport
After installation, we need to get default migration for creating new passport tables into database. So we will run the below command for this.
php artisan migrate
We will run below command to create the encryption keys needed to generate secure access tokens.
php artisan passport:install
Step3: Laravel Passport Configuration
We will create app/User.php models to map the classes to underlying database tables.
<?php

namespace App;

use Illuminate\Contracts\Auth\MustVerifyEmail;
use Illuminate\Foundation\Auth\User as Authenticatable;
use Illuminate\Notifications\Notifiable;
use Laravel\Passport\HasApiTokens;

class User extends Authenticatable
{
    use Notifiable, HasApiTokens;

    /**
     * The attributes that are mass assignable.
     *
     * @var array
     */
    protected $fillable = [
        'name', 'email', 'password',
    ];

    /**
     * The attributes that should be hidden for arrays.
     *
     * @var array
     */
    protected $hidden = [
        'password', 'remember_token',
    ];

    /**
     * The attributes that should be cast to native types.
     *
     * @var array
     */
    protected $casts = [
        'email_verified_at' => 'datetime',
    ];
}
We will create app/Providers/AppServiceProvider.php for register and run services for the application,
<?php

namespace App\Providers;

use Illuminate\Foundation\Support\Providers\AuthServiceProvider as ServiceProvider;
use Illuminate\Support\Facades\Gate;
use Laravel\Passport\Passport;

class AuthServiceProvider extends ServiceProvider
{
    /**
     * The policy mappings for the application.
     *
     * @var array
     */
    protected $policies = [
         'App\Model' => 'App\Policies\ModelPolicy',
    ];

    /**
     * Register any authentication / authorization services.
     *
     * @return void
     */
    public function boot()
    {
        $this->registerPolicies();

    }
}
We will also make changes into config/auth.php, which contains authentication configuration options for your Laravel instance.
<?php

return [

    'guards' => [
        'web' => [
            'driver' => 'session',
            'provider' => 'users',
        ],
        'api' => [
            'driver' => 'passport',
            'provider' => 'users',
        ],
    ],

]
Step4: Add Product Table
We will create migraton for products table by running PHP artisan command.
php artisan make:migration create_products_table
Then we will add following code to database/migrations products create PHP file to create products table.
<?php

use Illuminate\Support\Facades\Schema;
use Illuminate\Database\Schema\Blueprint;
use Illuminate\Database\Migrations\Migration;


class CreateProductsTable extends Migration
{
    /**
     * Run the migrations.
     *
     * @return void
     */
    public function up()
    {
        Schema::create('products', function (Blueprint $table) {
            $table->bigIncrements('id');
            $table->string('name');
            $table->text('detail');
            $table->timestamps();
        });
    }


    /**
     * Reverse the migrations.
     *
     * @return void
     */
    public function down()
    {
        Schema::dropIfExists('products');
    }
}
Then we will run the following command to run the migration.
php artisan migrate
Step5: Create Product Model
Now we will create product model app/Product.php for product table.
<?php

namespace App;


use Illuminate\Database\Eloquent\Model;


class Product extends Model
{
    /**
     * The attributes that are mass assignable.
     *
     * @var array
     */
    protected $fillable = [
        'name', 'detail'
    ];
}
Step6: Create Controller Files
We will create Controllers/API directory in controllers and create controllers. First we will create app/Http/Controllers/API/BaseController.php for send JSON response and sending errors if any.
<?php

namespace App\Http\Controllers\API;


use Illuminate\Http\Request;
use App\Http\Controllers\Controller as Controller;


class BaseController extends Controller
{
    /**
     * success response method.
     *
     * @return \Illuminate\Http\Response
     */
    public function sendResponse($result, $message)
    {
    	$response = [
            'success' => true,
            'data'    => $result,
            'message' => $message,
        ];


        return response()->json($response, 200);
    }


    /**
     * return error response.
     *
     * @return \Illuminate\Http\Response
     */
    public function sendError($error, $errorMessages = [], $code = 404)
    {
    	$response = [
            'success' => false,
            'message' => $error,
        ];


        if(!empty($errorMessages)){
            $response['data'] = $errorMessages;
        }


        return response()->json($response, $code);
    }
}
We will create app/Http/Controllers/API/RegisterController.php controllers for handling user register and login for API authentication.
<?php

namespace App\Http\Controllers\API;

use Illuminate\Http\Request;
use App\Http\Controllers\API\BaseController as BaseController;
use App\User;
use Illuminate\Support\Facades\Auth;
use Validator;

class RegisterController extends BaseController
{
    /**
     * Register api
     *
     * @return \Illuminate\Http\Response
     */
    public function register(Request $request)
    {
        $validator = Validator::make($request->all(), [
            'name' => 'required',
            'email' => 'required|email',
            'password' => 'required',
            'c_password' => 'required|same:password',
        ]);

        if($validator->fails()){
            return $this->sendError('Validation Error.', $validator->errors());
        }

        $input = $request->all();
        $input['password'] = bcrypt($input['password']);
        $user = User::create($input);
        $success['token'] =  $user->createToken('MyApp')->accessToken;
        $success['name'] =  $user->name;

        return $this->sendResponse($success, 'User register successfully.');
    }

    /**
     * Login api
     *
     * @return \Illuminate\Http\Response
     */
    public function login(Request $request)
    {
        if(Auth::attempt(['email' => $request->email, 'password' => $request->password])){
            $user = Auth::user();
            $success['token'] =  $user->createToken('MyApp')-> accessToken;
            $success['name'] =  $user->name;

            return $this->sendResponse($success, 'User login successfully.');
        }
        else{
            return $this->sendError('Unauthorised.', ['error'=>'Unauthorised']);
        }
    }
}
We will create app/Http/Controllers/API/ProductController.php controllers for handling API product CRUD operation.
<?php

namespace App\Http\Controllers\API;

use Illuminate\Http\Request;
use App\Http\Controllers\API\BaseController as BaseController;
use App\Product;
use Validator;
use App\Http\Resources\Product as ProductResource;

class ProductController extends BaseController
{
    /**
     * Display a listing of the resource.
     *
     * @return \Illuminate\Http\Response
     */
    public function index()
    {
        $products = Product::all();

        return $this->sendResponse(ProductResource::collection($products), 'Products retrieved successfully.');
    }

    /**
     * Store a newly created resource in storage.
     *
     * @param  \Illuminate\Http\Request  $request
     * @return \Illuminate\Http\Response
     */
    public function store(Request $request)
    {
        $input = $request->all();


        $validator = Validator::make($input, [
            'name' => 'required',
            'detail' => 'required'
        ]);

        if($validator->fails()){
            return $this->sendError('Validation Error.', $validator->errors());
        }

        $product = Product::create($input);

        return $this->sendResponse(new ProductResource($product), 'Product created successfully.');
    }


    /**
     * Display the specified resource.
     *
     * @param  int  $id
     * @return \Illuminate\Http\Response
     */
    public function show($id)
    {
        $product = Product::find($id);

        if (is_null($product)) {
            return $this->sendError('Product not found.');
        }

        return $this->sendResponse(new ProductResource($product), 'Product retrieved successfully.');
    }


    /**
     * Update the specified resource in storage.
     *
     * @param  \Illuminate\Http\Request  $request
     * @param  int  $id
     * @return \Illuminate\Http\Response
     */
    public function update(Request $request, Product $product)
    {
        $input = $request->all();

        $validator = Validator::make($input, [
            'name' => 'required',
            'detail' => 'required'
        ]);

        if($validator->fails()){
            return $this->sendError('Validation Error.', $validator->errors());
        }

        $product->name = $input['name'];
        $product->detail = $input['detail'];
        $product->save();

        return $this->sendResponse(new ProductResource($product), 'Product updated successfully.');
    }


    /**
     * Remove the specified resource from storage.
     *
     * @param  int  $id
     * @return \Illuminate\Http\Response
     */
    public function destroy(Product $product)
    {
        $product->delete();

        return $this->sendResponse([], 'Product deleted successfully.');
    }
}
Step7: Use Eloquent API Resources
Now we will use the Eloquent API resources with API to make response layout same as of model object. We need to create it using following command.
php artisan make:resource Product
When we run the above command, a new file created at app/Http/Resources/Product.php with following code.
<?php

namespace App\Http\Resources;

use Illuminate\Http\Resources\Json\JsonResource;

class Product extends JsonResource
{
    /**
     * Transform the resource into an array.
     *
     * @param  \Illuminate\Http\Request  $request
     * @return array
     */
    public function toArray($request)
    {
        return [
            'id' => $this->id,
            'name' => $this->name,
            'detail' => $this->detail,
            'created_at' => $this->created_at->format('d/m/Y'),
            'updated_at' => $this->updated_at->format('d/m/Y'),
        ];
    }
}
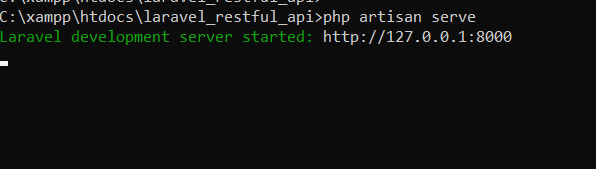
Step8: Run Application
Now finally we will run our REST API application by executing following command.
php artisan serve
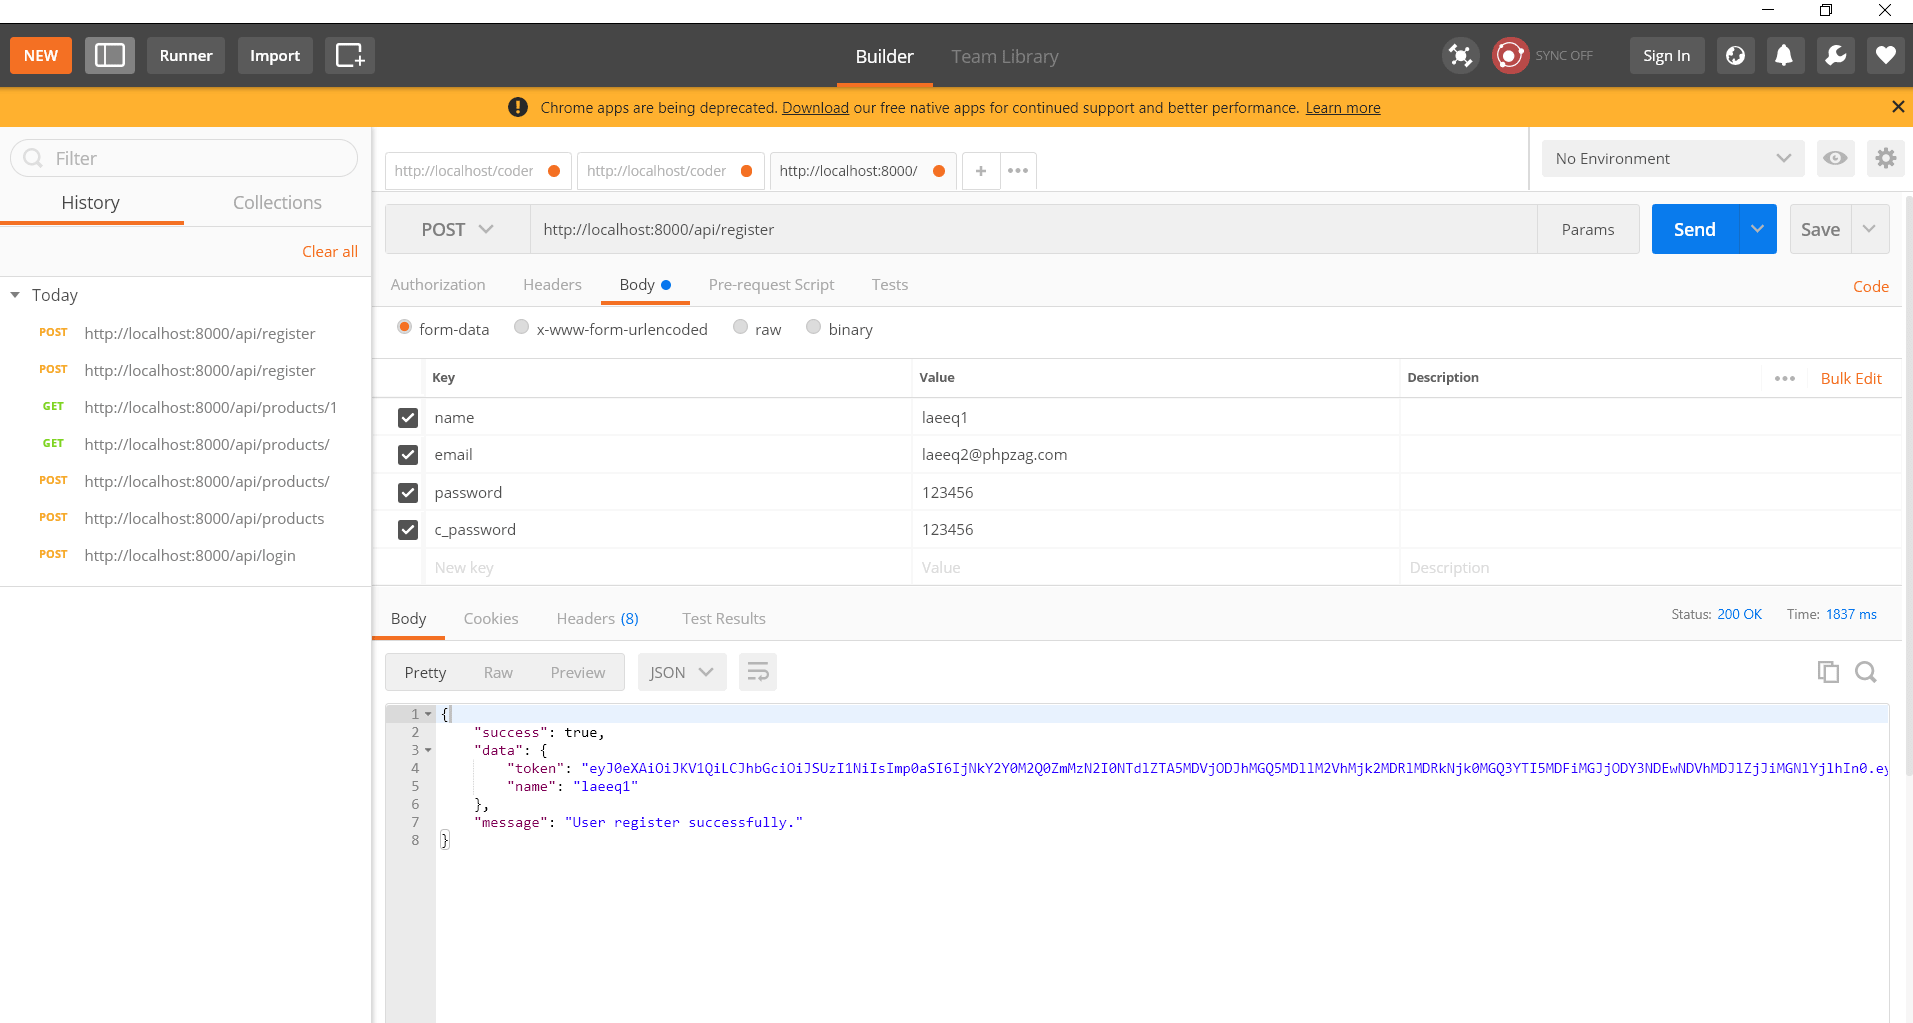
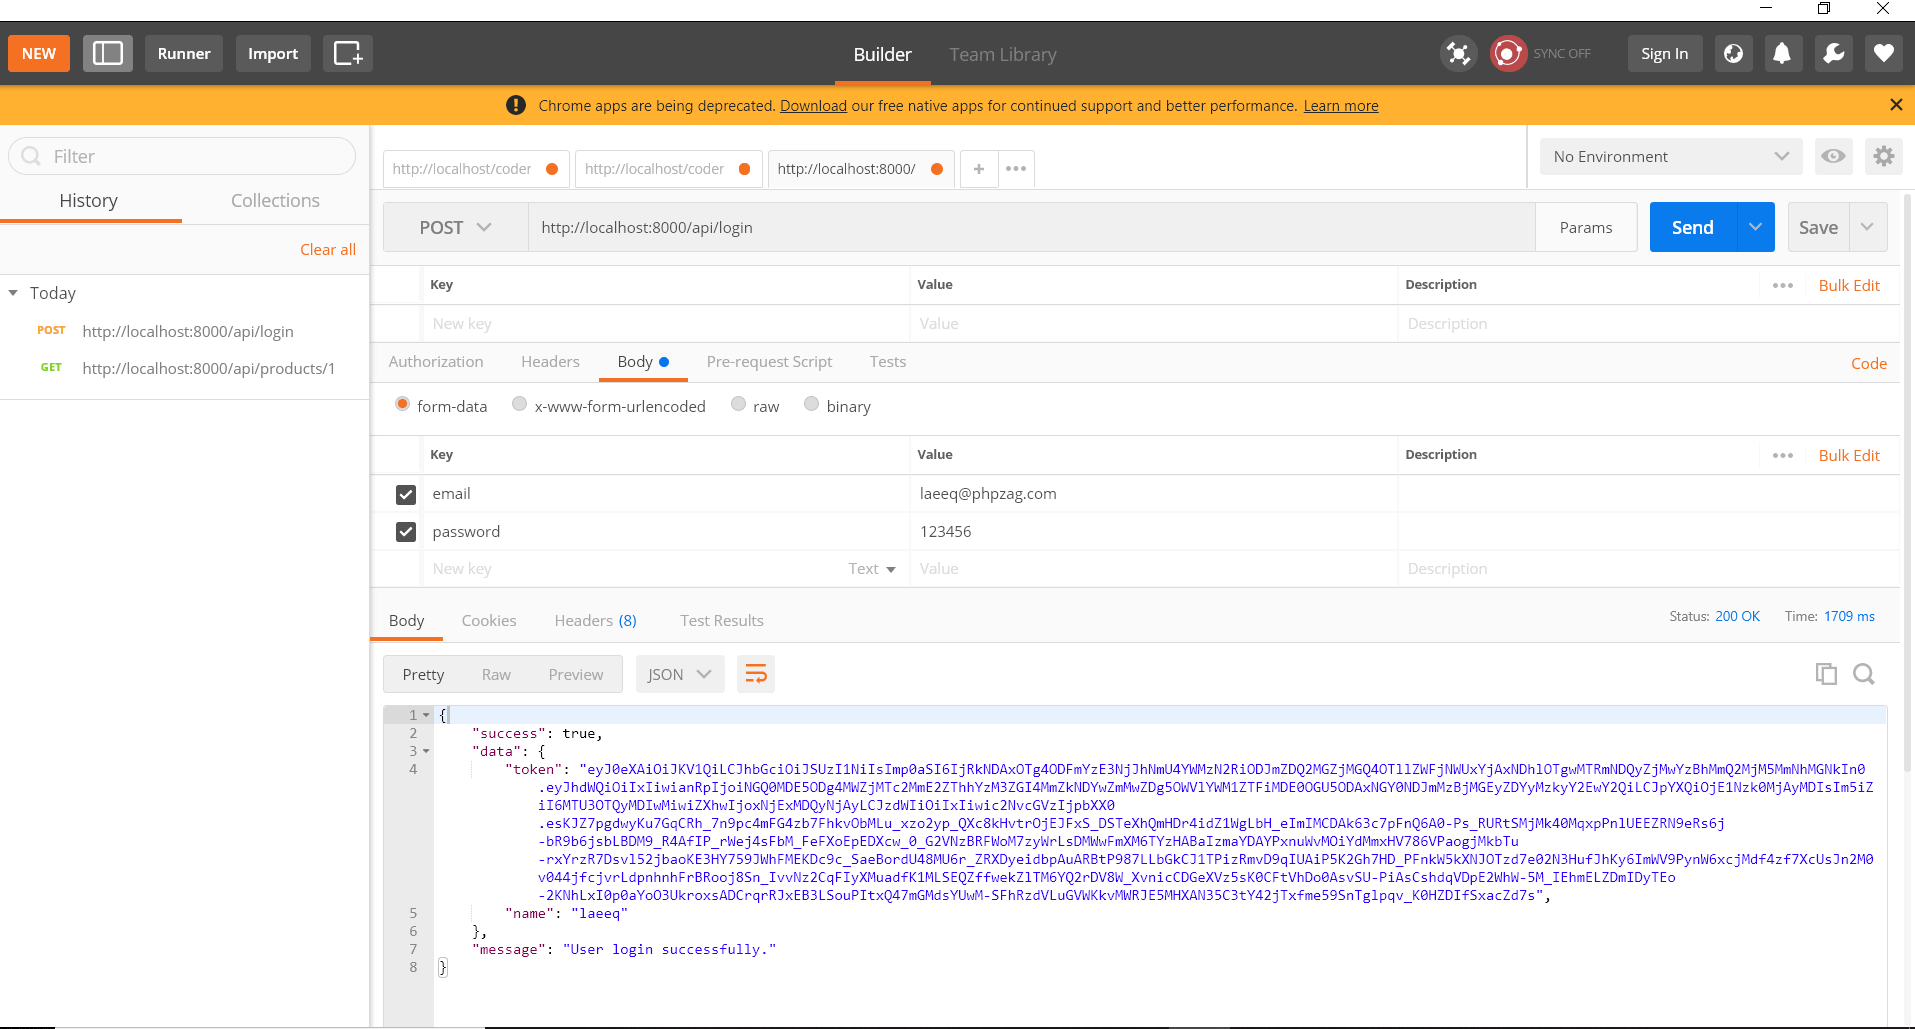
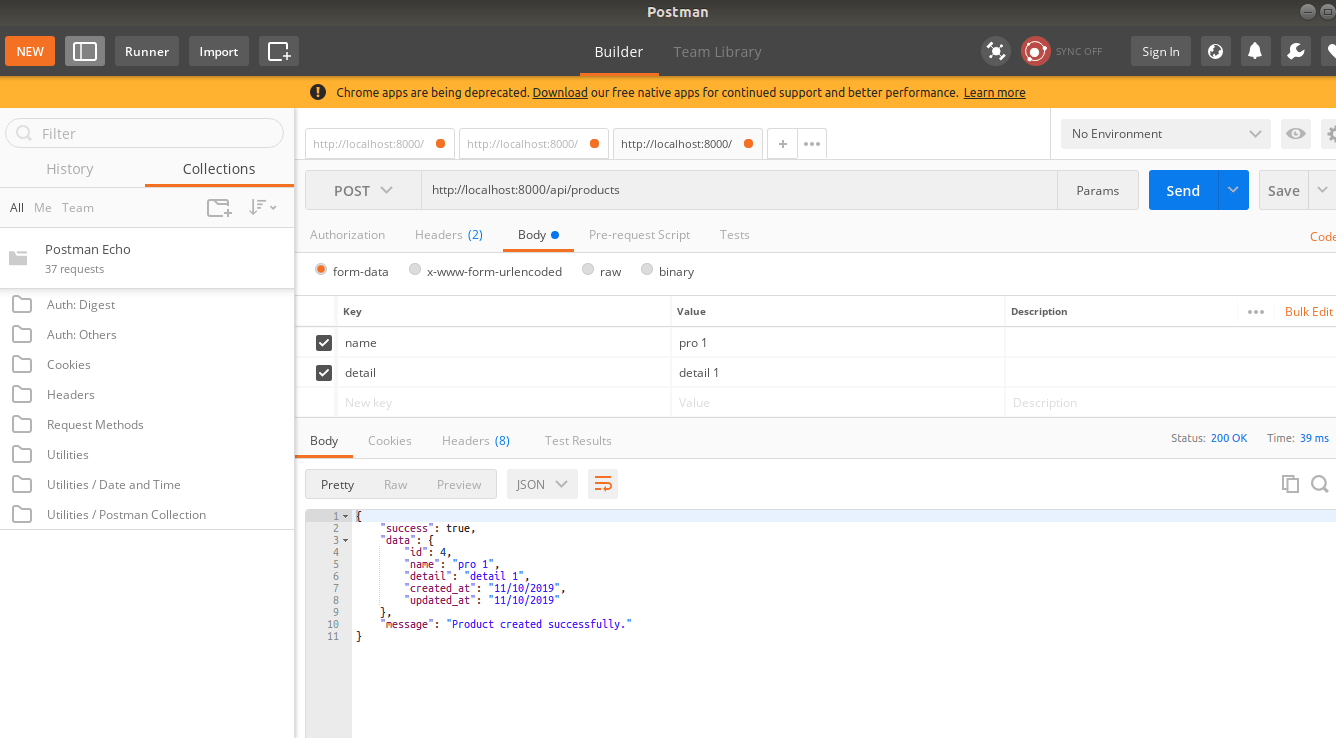
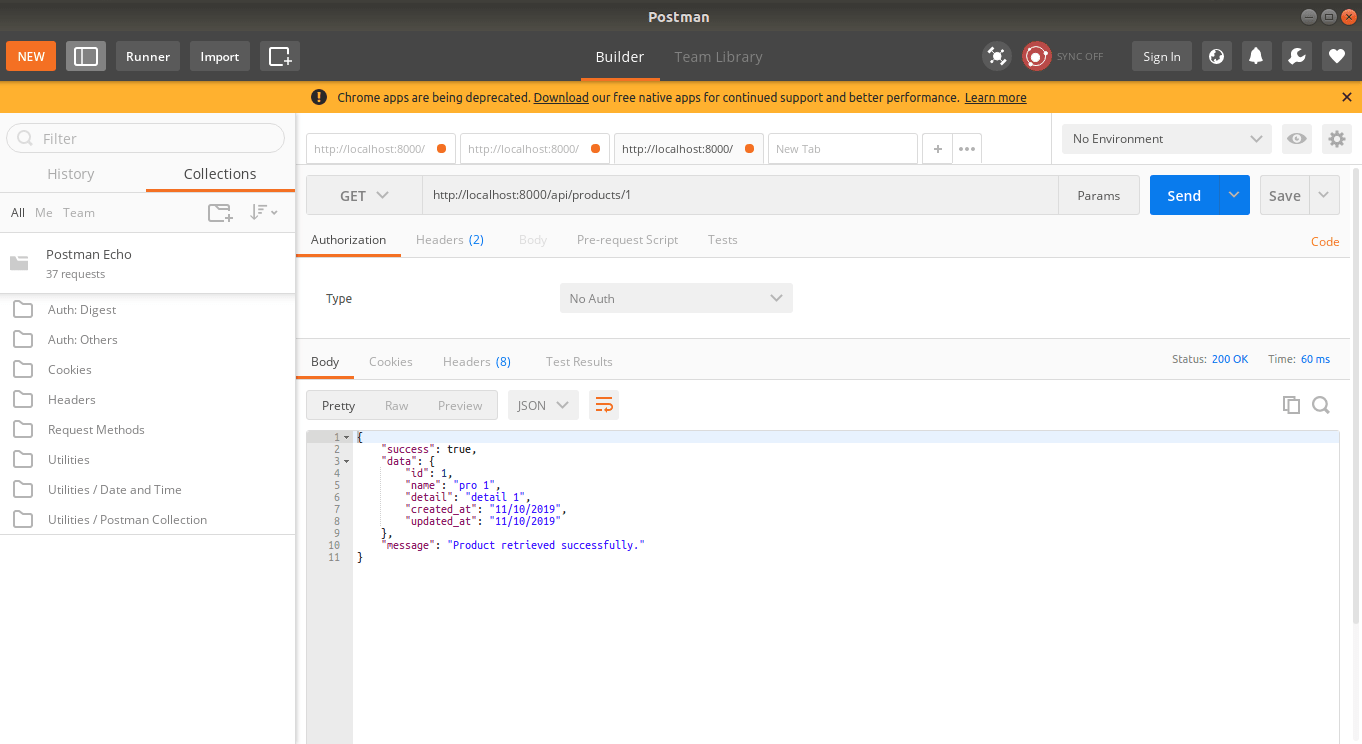
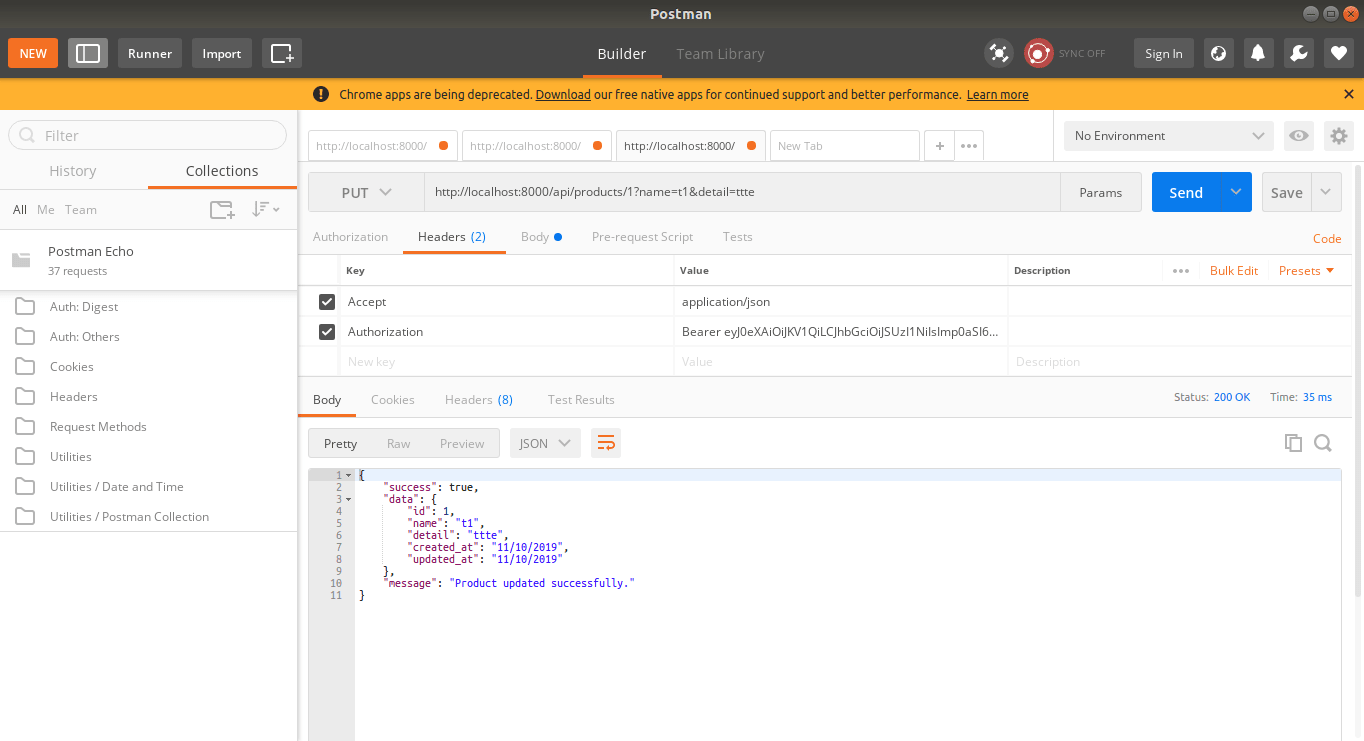
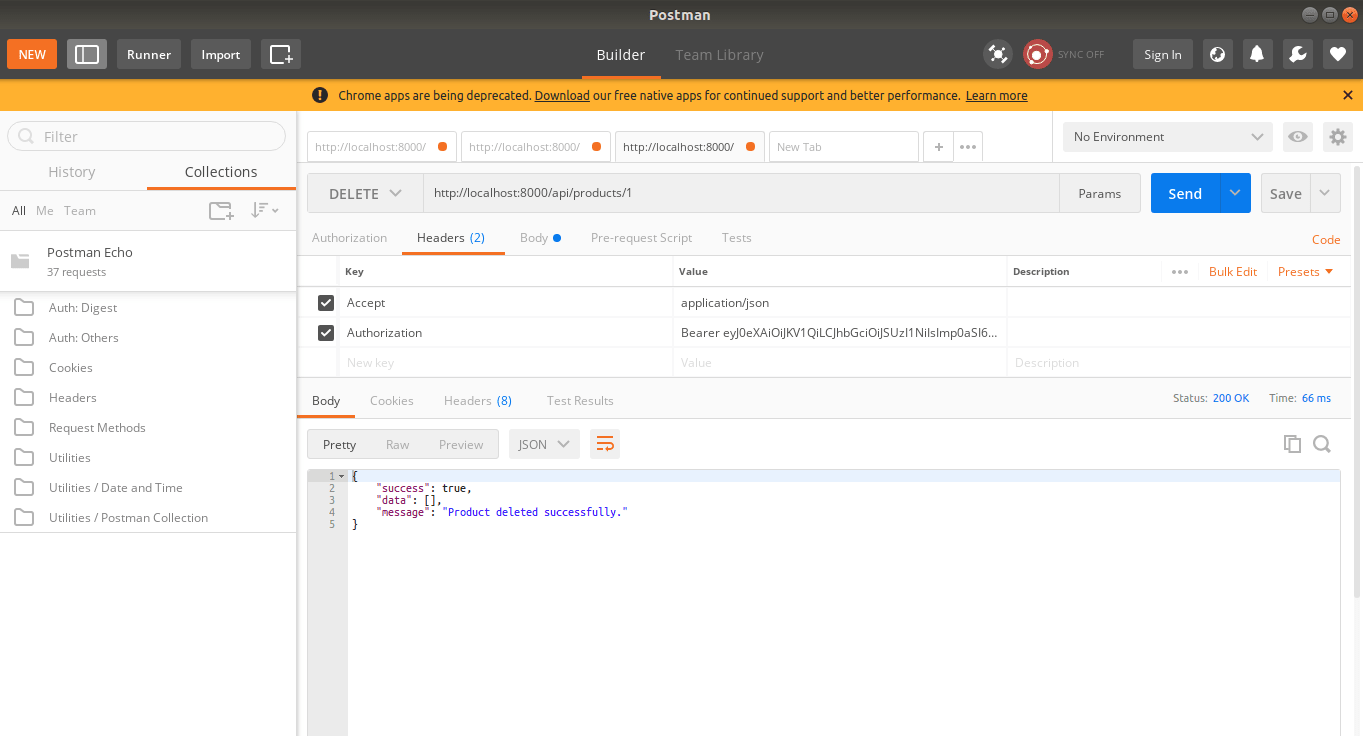
We will run the API URL with POSTMAN App. Here is the screenshot of running URLs.
POST: http://localhost:8000/api/register
POST: http://localhost:8000/api/login
POST : http://localhost:8000/api/products
GET: http://localhost:8000/api/products/{id}
PUT : http://localhost:8000/api/products/{id}
DELETE : http://localhost:8000/api/products/{id}
You can download the script from the Download link below.
Download
You may also like:
- Build Live Chat System with Ajax, PHP & MySQL
- Create Event Calendar with jQuery, PHP and MySQL
- Build Invoice System with PHP & MySQL
- Push Notification System with PHP & MySQL
- Create Bootstrap Cards with PHP and MySQL
- Build Content Management System with PHP & MySQL
- Convert Unix Timestamp To Readable Date Time in PHP
- Ajax Drop Down Selection Data Load with PHP & MySQL
- Inventory Management System with Ajax, PHP & MySQL
- Drag and Drop File Upload using jQuery and PHP
- Load Dynamic Content in Bootstrap Popover with Ajax, PHP & MySQL